Imagine a scenario in your warehouse where a heavy-duty machine suddenly malfunctions, throwing the entire operation into disarray. But just in this moment of crisis, our heroes—a set of carefully selected Hydraulic Tools—step in. With their precision and unparalleled strength, they swiftly turn the tide. In this blog post, we will take you behind the scenes to understand how these hydraulic tools tackle challenges one by one, from crimping tools to hydraulic pullers, with each operation executed with pinpoint accuracy, ensuring a seamless workflow and doubling efficiency.
Background of the Task
At a certain logistics center, a critical sorting machine had its large bearings worn out due to prolonged use, necessitating an urgent replacement. This task demanded not only precision but also speed to minimize the impact on operations. After ensuring each Hydraulic Tool was in optimal working condition, the team proceeds with the task.
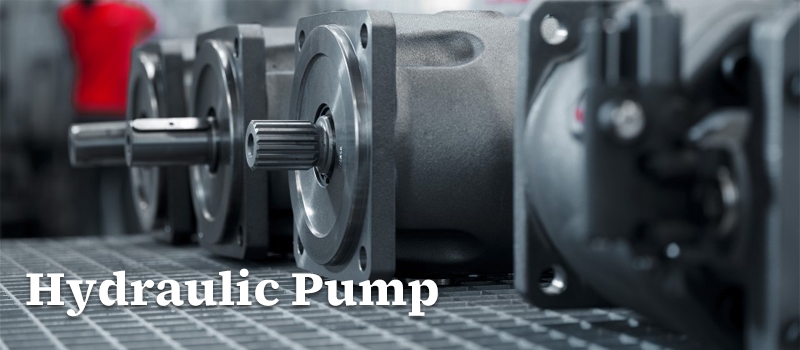
Among the variety of tools, the hydraulic pump stands as the linchpin. It is the power source of the hydraulic system, without which the other equipment would be rendered inoperative. A high-quality hydraulic pump is characterized by its stable output pressure, low noise level, and long lifespan. During operation, the hydraulic pump compresses hydraulic oil, providing power to the other hydraulic tools.
Step One: Dismantling the Old Bearing
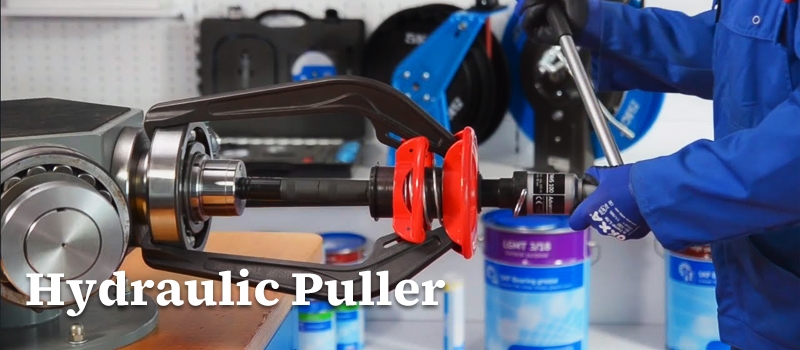
Using the Hydraulic Puller: A tool designed for the removal and installation of bearings, gears, and other components. To operate, the hydraulic puller is fixed to the component to be removed, and the hydraulic pump supplies the pulling force to complete the disassembly.
- Attach the claws of the hydraulic puller to the old bearing.
- Connect the hydraulic puller to the hydraulic pump.
- Start the hydraulic pump and gradually increase the pressure until the old bearing is smoothly removed.
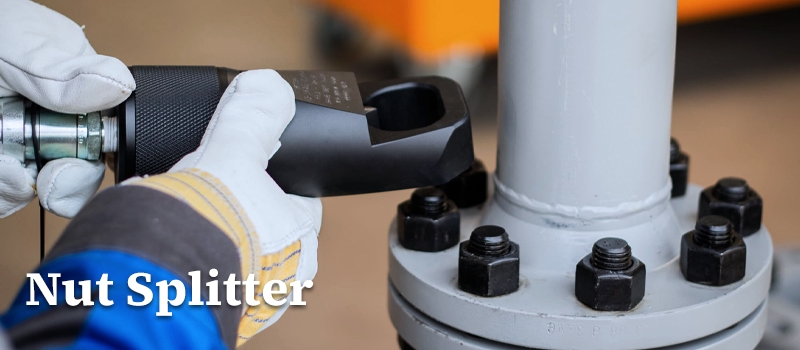
Using the Nut Splitter (if the bearing's nut is damaged): A tool used for splitting damaged or rusted nuts. To use, place the nut splitter over the nut, connect it to the hydraulic pump, and initiate the pump to split the nut.
- Place the nut splitter over the damaged nut.
- Connect the nut splitter to the hydraulic pump.
- Start the hydraulic pump and gradually increase the pressure until the nut is split.
Step Two: Preparing for the Installation of the New Bearing
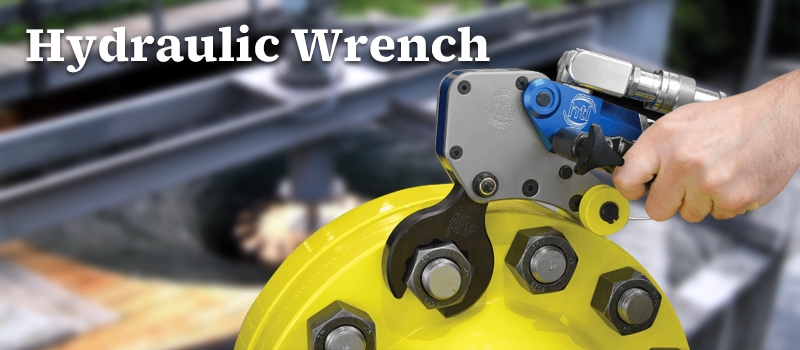
Using the Hydraulic Wrench: A high-torque wrench commonly used for the tightening and loosening of bolts. It boasts high output torque, speed, and reduced labor intensity.
- Clean the bolt threads to ensure they are free of debris.
- Place the hydraulic wrench over the bolt.
- Start the hydraulic pump and tighten the bolt to the specified torque value.
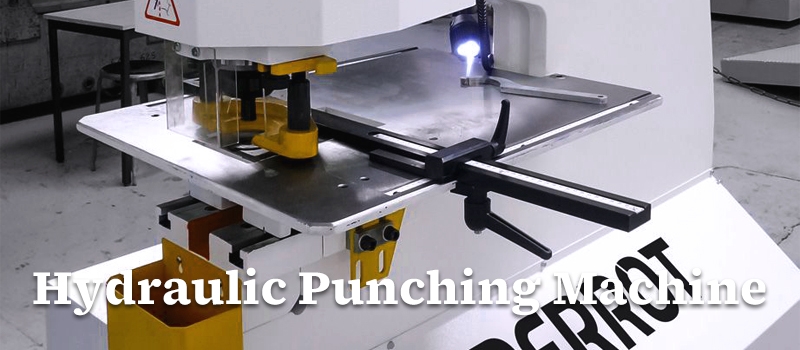
Using the Hydraulic Punching Machine (if a hole needs to be punched in the new equipment): Hydraulic punching machines can be used to punch holes in sheet metal for mounting hooks or other attachments, offering both precision and ease of use for anyone.
- Place the metal sheet on the punching machine's table.
- Adjust the machine to ensure the hole is accurately positioned.
- Start the hydraulic pump to perform the punching operation.
Step Three: Installing the New Bearing
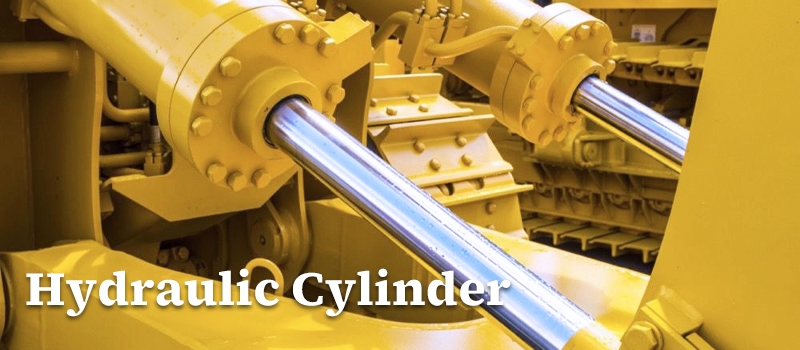
Using the Hydraulic Cylinder: An executive component of the hydraulic system that converts hydraulic energy into mechanical energy for linear reciprocating motion. Through the pressure supplied by the hydraulic pump, the hydraulic cylinder can push or lift heavy objects.
- Place the new bearing in the correct position.
- Use the hydraulic cylinder to gently push the bearing into place, ensuring a smooth installation.
- Use the hydraulic wrench again to securely fasten the bearing's bolts.
Step Four: Final Inspection
Check all connections:
- Ensure all bolts are securely fastened.
- Check if any cables or wires need to be reconnected.
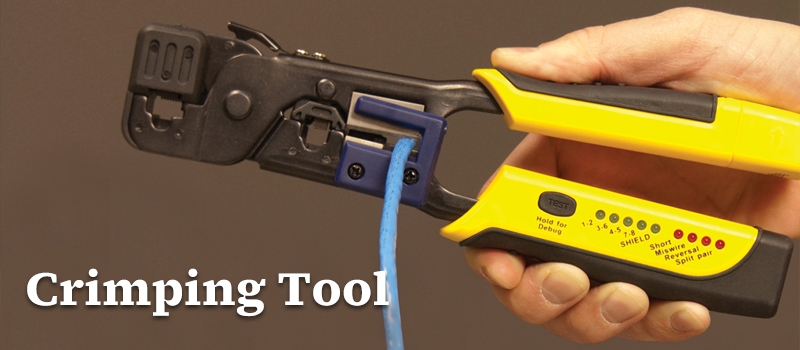
Using the Crimping Tool: Mainly used for connecting wires, cables, and pipes, the crimping tool operates on hydraulic principles, ensuring a strong and reliable connection. Its strong pressure capability easily handles various sizes of crimping tasks.
- If any cables or wires need to be reconnected, use the crimping tool for crimping.
- Place the cable in the crimping tool's mold, start the hydraulic pump, and complete the crimping process.
After completing all the above steps, the final task is to clean up the site. Ensure the work area is tidy, free of oil stains and debris, and return all used hydraulic tools to their proper place.
Through this case, we clearly see the role of Hydraulic Tools in collaborative work. They are not only efficient individual tools but also a tightly-knit team. Each tool plays a crucial role at critical moments, significantly reducing maintenance time. For instance, the combined use of the hydraulic puller and nut splitter quickly resolves issues with damaged nuts; the stable torque provided by the hydraulic wrench and the precise positioning of the hydraulic cylinder together form a powerful maintenance system.
A handy set of tools can make a big difference in every little repair at home. These tools we present to you today will not only help you tackle your home maintenance challenges with ease, but also make these daily tasks more efficient and safer. To buy home tools, visit the online store TooL. From replacing the bearings in your garage door to trimming the cables on your patio, these hydraulic tools are ideal for your home repairs with their excellent performance and easy operation.