Micrometer
Inside Micrometer, 5-30mm, 0.01mm
4-Piece Outside Micrometer, 0-100mm, 0.01mm
Digital Outside Micrometer, 0-25mm, 0.003mm
Inside Micrometer, 2-300mm, 0.004mm
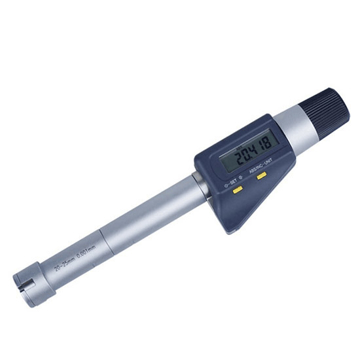
Digital Inside Micrometer, 2-100mm, 0.004mm
Micrometer
Spiral micrometer, also known as micrometer, is a more precise measuring tool than vernier caliper, with high accuracy and large measuring range. It is often used to measure the diameter of filaments and small balls and the thickness of thin slices.
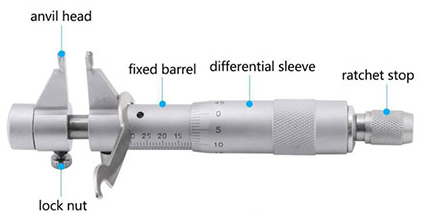
Structure of the inside micrometer
The structure of the micrometer is shown in the figure. The scale of the micrometer anvil head is fixed on the frame, the lock nut, the fixed barrel, the differential cover, and the ratchet stop are linked together, and set on the fixed scale by precision thread.

How does the spiral micrometer work?
The screw micrometer is made using the principle of screw amplification. The screw rotates one circle in the nut, and the screw advances or retreats along the axis of rotation for a pitch distance. Therefore, the tiny distance moved along the axis can be expressed by readings on the circumference.
When measuring, when the small anvil and the micrometer screw are close together, if the zero point of the movable scale coincides with the zero point of the fixed scale, screw out the micrometer screw, and make the surface of the small anvil and the micrometer screw just touch the two sides of the length to be measured. Then the distance the micrometer screw moves to the right is the measured length. The whole millimeter is read on the fixed scale, and the decimal part is read on the movable scale.
How to read the result of micrometer measurement?
1. Accuracy of the spiral micrometer
The spiral micrometer is made using the principle of converting straight-line distance into angular displacement. The minimum graduation value of the fixed scale on the main ruler is 0.5 mm, and the spiral ruler can be shared by the movable scale 50 divisions, when the movable scale rotates one circle, it advances or retreats by 0.5mm on the main scale, then the movable anvil advances or retreats 0.01 mm for each division of the movable scale, so it can measure the length to an accuracy of 0.01 mm.
2. Use and reading method
Place the object to be measured between two small anvils, then tighten the object to be measured with the knob, and then adjust it with the micro knob until it makes a "click" sound before reading. First read the reading of the fixed ruler. To read the full millimeter scale, pay attention to whether there is a half-millimeter scale, and then read the reading on the movable scale corresponding to the horizontal line on the fixed scale (estimated data is required), multiply this number by 0.01 and add the readings on the fixed scale to get the final reading.
3. Reading calculation exercise
1. (Add the reading on the sleeve to the cylinder)
2. The reading on the cylinder (21 + Dx) mm
3. Reading on the sleeve Dx = 0.495 mm
4. Reading value: (21 + 0.495) = 21.495 mm.
4. Zero error of spiral micrometer
When the two small anvils of the screw micrometer are close together, if the reading of the ruler is not zero, the reading at this time is called its zero error.
3 tips to pay attention to when using a micrometer
1. Check the zero point reading before measurement and make zero point correction on the measurement data.
2. When checking the zero point reading and measuring the length, do not directly rotate the micrometer screw and micrometer barrel, but gently rotate the ratchet knob.
3. After the measurement, there should be a gap between the measuring anvil and the micrometer screw to avoid damage to the thread due to thermal expansion.


